1. 가상환경 설정
|
conda create -n deiqt python == 3.9
pip install torch==1.11.0+cu113 torchvision==0.12.0+cu113 torchaudio==0.11.0 --extra-index-url https://download.pytorch.org/whl/cu113 pip install pandas pip install torchmetrics pip install timm pip install torchinfo pip install yacs pip install scipy pip install termcolor pip install wandb |
(1) Wandb 초기 설정
1. Wandb 홈페이지(https://wandb.ai/site) 회원가입
2. Wandb 설치
3. Wandb 로그인
- 터미널에 아래와 같이 차례로 입력
| wandb login API 값 - Wandb 홈페이지 (https://wandb.ai/authorize)에서 찾을 수 있음 |
4. Wandb.init() 수정 (main.py 130번줄)
- Wandb 홈페이지에서 project 생성 후 project_name에 생성한 project 이름 입력
- entity는 제거해도 됨
- Wandb documentation을 참고할 것(https://docs.wandb.ai/ref/python/init)

2. Training
(1) Dataset download
- 논문 저자의 github에서 KONIQ-10K데이터 셋을 IQA_dataset에 저장

(2) 코드 수정
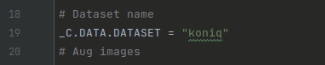
1) config.py 수정
- KONIQ-10K 데이터셋에 대한 실험을 진행하기 위해 아래와 같이 수정
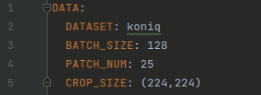
2) config / vit / deiqt_livec.yaml
- DATASET = koniq로 수정
- BATCH_SIZE = 128
-> 논문에서 KONIQ-10K 데이터셋에 대한 실험에서 batch size 128로 진행
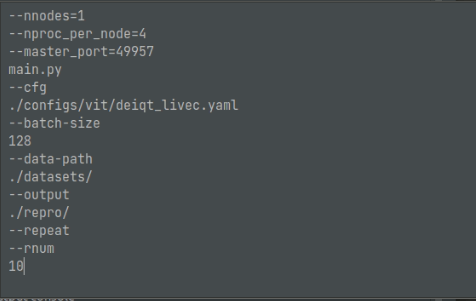
(3) 실행
1) 파이썬 Configurations 설정
- script path -> Module name으로 전환
- Module name = torch.distrebuted.run
- python interpretor 설정
- Working directory = DEIQT-main으로 설정
- Parametor 설정은 아래와 같음

3. 결과
- 위 논문의 Table 1에서 KONIQ-10K 데이터셋에 대한 결과 재현
(1) Loss
1) 10 epoch까지 학습 시켰을 때 LOSS 변화

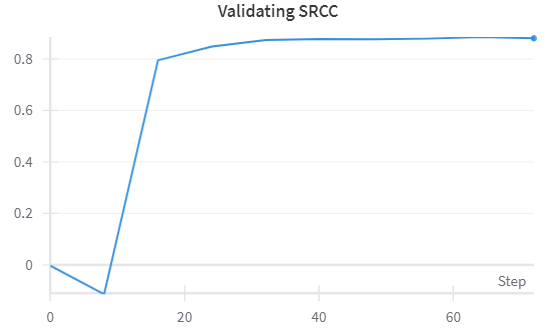
(2) Score
1) 10 epoch까지 학습 시켰을 때 Score 변화
- 10 epoch에서 가장 높은 score 기록
 |
 |
(3) 논문 저자 Github 결과와 비교
| Method | SRCC | PLCC |
| github | 0.921 | 0.934 |
| Reproduction result | 0.881 | 0.913 |
4. 참고 문헌
[1]Guanyi Qin and Runze Hu and Yutao Liu and Xiawu Zheng and Haotian Liu and Xiu Li and Yan Zhang, "Data-Efficient Image Quality Assessment with Attention-Panel Decoder, " Proceedings of the AAAI Conference on Artificial Intelligence (AAAI), 2023


